Guide · Roof lanterns
LED Strip Lighting Around a Roof Lantern
By day a lantern frames the sky; by night the same glass can turn flat and dark. LED strip in the lining keeps it glowing instead.
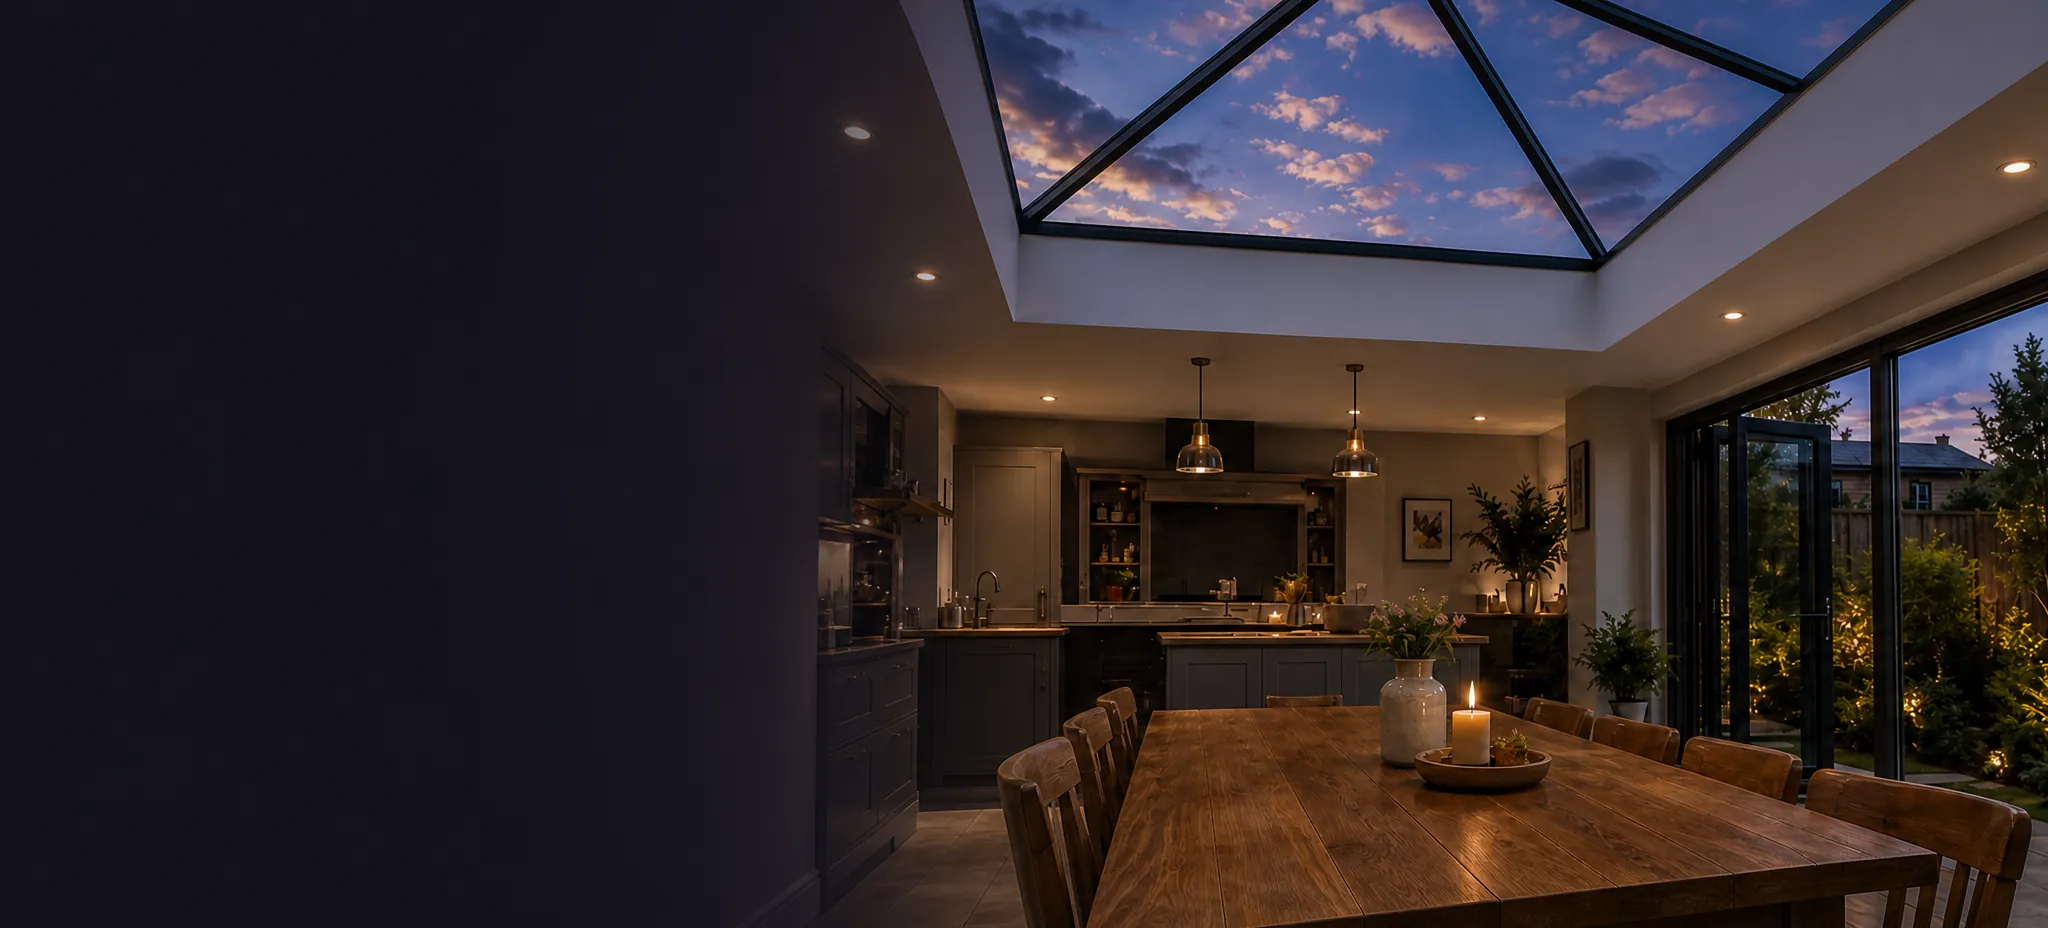
A roof lantern does two jobs, and the second one is easy to leave unplanned. By day it frames the sky and pulls light down into the room below; once the lamps go on and the sky outside goes dark, that same glass can turn into a flat black rectangle overhead, or worse, a faint mirror showing the kitchen back at itself. LED strip lighting built into the lantern's own lining answers the second job: instead of a hole in the ceiling, the frame, the hips and the underside of the roof glow softly from within, and the lantern keeps earning its place after dark rather than switching off along with the view. This guide covers where that strip actually sits, how it is run around the lantern's shape, and what needs planning before the plaster closes over it.
Why a bright sky by day goes flat and dark by night
The glass itself has not changed between three in the afternoon and eight in the evening; what has changed is which side of it is brighter, and that is what decides whether you see sky or your own kitchen looking back at you.
In daylight the sky outside is almost always brighter than the room, so the eye reads straight through the glass to the sky beyond it, and the frame and any glazing bars sit as thin dark lines against that brightness. Once evening comes and the room lamps are the brighter surface, that relationship flips. Glass reflects a little of everything that hits it, and with more light coming from below than from above, the lantern starts behaving like a dark window at night rather than a clear one, showing the ceiling, the tops of the units and the room's own light fittings rather than any sky. A cold surface can add to it: as the glass edge cools after dark, a faint film of condensation can sit on the inner pane, which our guide to why condensation forms inside a roof lantern covers in more detail, and that film scatters what little light there is rather than letting it pass cleanly.
None of that is a fault in the glass or the fit. It is simply how glass behaves once the brighter light is inside the room instead of outside it, and it is the reason a lantern that looks spectacular at midday can feel like a black patch on the ceiling by the time the household sits down for the evening. Lighting the lining changes what fills that patch.
Where the strip actually sits: a shadow gap below the frame
The strip itself is rarely visible as a strip. It sits in a shallow recess, a shadow gap formed in the plaster or timber lining just below the point where the frame meets the reveal, so what you see from the room is a line of soft light rather than a fitting.
That recess is usually a routed groove behind a small lip, sized to hide the tape and its diffuser channel while still letting the light wash upward across the underside of the glass, the glazing bars and, on a hipped lantern, the sloping hip rafters themselves. Aimed that way, the light grazes across the structure rather than shining down into anyone's eyes, which is what turns the lantern into a glowing frame rather than a floodlit box. How that pelmet is formed depends on what the lantern sits on. On an insulated GRP kerb the recess can often be built into the moulding itself; on a timber upstand it is usually a separate batten and plasterboard detail fixed after the carpentry is finished, and the choice between the two affects how the recess is set out before the room is closed up, which our guide to roof lantern upstands: timber, kerb or insulated sets out on its own terms.
Getting the depth of that recess right matters more than its width. Too shallow and the diffuser is visible as a bright line the moment anyone stands off to one side; too deep and the light struggles to reach the glass at all, staying trapped low in the pelmet instead of washing up the slope. It is a small enough detail that it is worth agreeing at survey rather than leaving to be worked out once the plasterer is on site, in much the same way the reveal and the frame line are agreed on the sightline sketch before the roof is opened.

Running the strip around a hip, a ridge or four straight sides
A lantern is rarely a simple square box from a wiring point of view, and its shape decides how many lengths of strip are needed and where the joins fall.
A pyramid lantern draws its four hips up to a single point, so the pelmet is usually four short, equal runs meeting at four mitred corners, one under each hip. A double hipped lantern, longer than it is wide with a short ridge along the top, needs two longer runs along the eaves sides and two shorter, angled runs at the hipped ends, so the corners are not identical and the strip lengths have to be cut and connected to suit rather than assumed to match. A flat topped, contemporary lantern with vertical sides is the simplest case: four straight runs and four square corners, closer in principle to lighting a straight ceiling recess than a pitched roof. Our guide to pyramid, double hipped and contemporary lanterns covers how those shapes suit different rooms; this is the same question asked of the wiring rather than the view.
| Lantern shape | Pelmet runs | Corners to plan |
|---|---|---|
| Pyramid | Four equal runs | Four mitres, one per hip |
| Double hipped | Two long, two short | Four unequal mitres |
| Contemporary flat topped | Four straight runs | Four square corners |
Whichever shape it is, the aim at each corner is the same: a joint that does not show as a dark gap or a bright hotspot once the strip is lit. Corner connectors made for the tape, rather than a cable simply bent round the angle, keep the light continuous across the mitre, and it is worth confirming before the pelmet is closed up that every run has been tested lit, not just wired, since a dead section is far harder to reach afterwards than before the plaster goes on.
Colour temperature, dimming and what it does to the view
The colour of the light matters as much as where it sits, because it decides whether the lantern reads as a warm frame around the room or a cold ring competing with it.
A warm white, broadly in the range most household lamps already use, sits comfortably alongside pendant and downlighting rather than standing out from it, and keeps the lantern feeling like part of the room's own lighting rather than a separate fitting bolted on afterwards. A cooler, bluer white can look clinical set against a dark sky, and tends to draw more attention to itself than to the structure it is meant to be lighting. Dimming matters just as much as colour. Strip fitted with a dimmable driver can sit low, as a quiet backdrop while the room's main lighting does the work, or come up brighter on its own once the rest of the room is turned down, which is usually the more flattering setting: full sky by day, a soft glow around the frame in the evening, rather than a bright box lit from below at every hour.
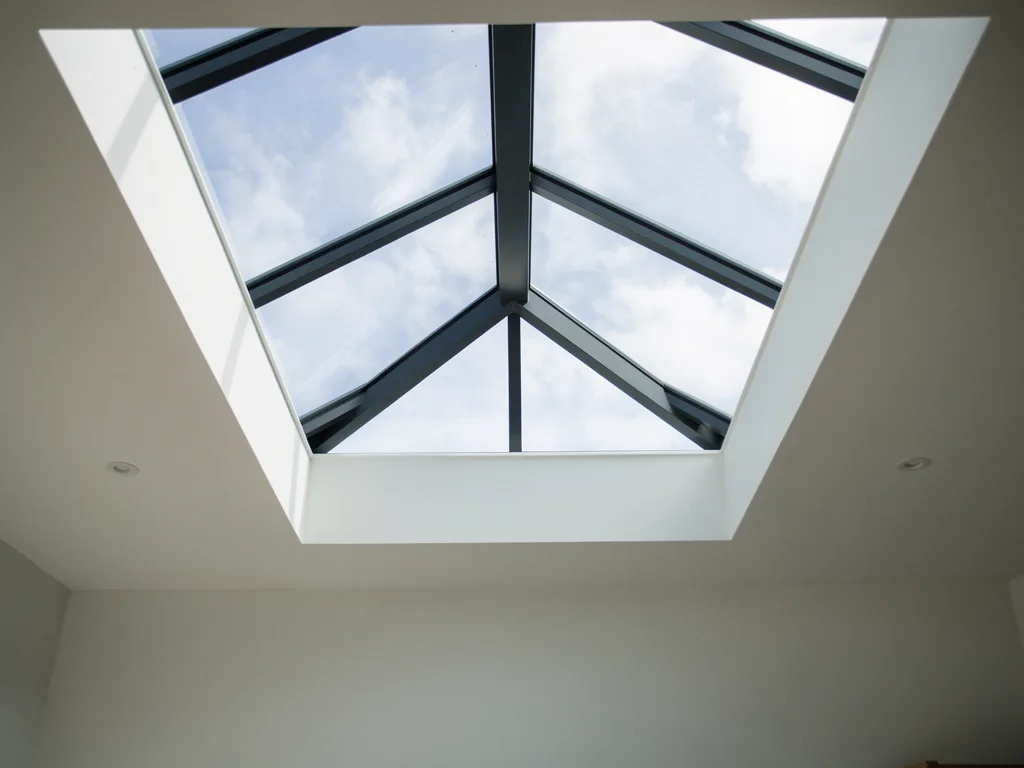
Frame colour plays into this too. A dark frame against a lit pelmet shows a clean, defined edge to the glow; a pale frame blends into it more softly, and either can work depending on the room, which our guide to what colour frame suits a roof lantern looks at from the daytime view rather than the evening one. Bar spacing has a similar effect after dark as it does by day: a lantern with a single central bar, covered in our guide to roof lantern glazing bars and the view up, throws one clean shadow line up through the lit glass, where a busier grid of bars breaks the glow into smaller panels rather than one continuous sheet of light.
Power, drivers and keeping the edge of the glass dry
None of this light does anything useful if the wiring behind it is an afterthought, and a lantern roof is an awkward place to go back into once the room is finished.
Most strip suited to this job runs on low voltage, fed from a driver that converts the household mains supply down to the tape's own working voltage. That driver is not part of the visible pelmet; it belongs somewhere out of sight and out of the weather, in the ceiling void above the extension, in a nearby cupboard, or wherever the rest of the extension's electrics are gathered, with the low-voltage cable run back to it rather than a mains cable brought anywhere near the glass. Where the recess sits close to the cold edge of the lantern, the same edge where condensation can form on a cool night, a tape rated for a damp environment is worth specifying rather than the driest, cheapest option, simply because that edge of the roof is the one place in the room where a little moisture is normal rather than a fault.
Electrical work of this kind in a kitchen or similar room falls within Part P of the Building Regulations, which treats kitchens as a special location because of the water and worktops nearby, so a new lighting circuit needs to be carried out and signed off properly rather than treated as a simple accessory added after the room is finished. That sits alongside, not instead of, the structural side of the job. We handle the Building Control notification for the roof opening itself where that work is notifiable, and our guide to roof lantern building regulations sets out what is assessed there; the lighting circuit is a separate piece of work planned at the same time rather than folded into that same notification.
Sharing the reveal with blinds and an existing pelmet
The lantern's lining is not only doing lighting duty, and the strip has to share that space with whatever else lives in the same shadow gap.
Where fitted blinds are wanted on the lantern's sloping sides, the blind box itself usually sits in or near the same recess the light would otherwise use, so the two need planning together rather than one being squeezed in after the other is finished. Our guide to can you put blinds in a roof lantern covers how those boxes fold away; agreeing the lighting line at the same time as the blind line keeps both tidy rather than one crowding the other. On an orangery, the lantern usually sits within a much deeper perimeter pelmet running around the room below the flat sections of roof, and that pelmet often already carries its own run of lower level lighting. In that case the lantern's own strip is better planned as a second, higher glow that complements the existing run rather than repeating it, which our guide to setting a lantern into an orangery roof looks at in full.
Over a kitchen table or island, where the lantern is usually the room's one deliberate ceiling feature, the strip is worth treating as background to the pendant or feature lighting over the table itself rather than a rival to it. Our guide to a roof lantern over the kitchen: planning it around the table looks at placing the glass over where people actually sit; the lighting plan for the evening is the other half of that same decision, since a lantern positioned well for the daytime view is usually positioned well for the evening glow too.
Evenings under a lantern across Peterborough's extensions
Most of the lanterns going onto Peterborough homes sit over a single storey kitchen or dining extension, and the evening they are lit for is a Fenland one rather than a generic one.
The Fens run flat to the east and north of the city, and a flat horizon means dusk arrives with very little in the way, no hills or high ground to hold on to the last of the light. The contrast between a bright room and a dark sky, the thing that turns a lantern from a window into a mirror after dark, is sharper here than it would be somewhere with a broken skyline softening the change. A lit pelmet earns its keep in exactly that setting: it gives the eye something to read in the ceiling once the sky itself has gone properly dark, rather than leaving a flat black shape sitting over the table. Across the newer townships, Bretton, Orton, Werrington and Hampton, where flat-roofed rear extensions built since the 1970s are now, in some cases, due a lantern in place of an older, tired rooflight, the same wiring questions apply: where the driver sits, how the runs meet at the corners, and whether the existing extension's consumer unit has room for one more circuit before the plaster goes back up.
If you are planning a new lantern, or adding lighting to one already in place, book a home visit or message us on WhatsApp and we will look at the pelmet detail alongside the frame and reveal on the sightline sketch, so the evening glow is agreed on paper at the same time as the daytime view. Our guide to what affects the cost of a rooflight covers where a lighting run typically sits within the wider job.
Questions about lighting a lantern after dark
A few questions come up often enough once the strip is on the table as an option, and they are worth setting out plainly rather than leaving to be discovered mid-job.
Can LED strip be added to a lantern that is already fitted?
Often, yes, provided the existing lining has, or can be given, enough depth for a recess and there is a sensible route back to a power supply. It usually means opening up the plaster around the base of the lantern rather than disturbing the glass or the frame itself, so it is worth planning alongside any other decorating work to the room.
Does the strip show up as a bright line rather than a soft glow?
Only if the recess is too shallow for the diffuser it is holding. A properly sized shadow gap keeps the tape and its channel out of direct view from normal seating and standing positions in the room, so what is seen is the light on the lantern's own surfaces rather than the fitting producing it.
Will the lantern still look dark from outside the house at night?
From outside, a lit lantern usually shows as a soft glow through the glass rather than a bright beacon, since the light is aimed up into the pelmet and across the structure rather than out through the roof. How visible that glow is from the garden depends on the glass specification and the roof's own pitch.
Does the lighting affect how the lantern is insulated or how it performs in winter?
No. The lighting sits in the plaster lining below the frame and has no bearing on the glass, the kerb or the insulation around the opening, which our guide to roof lantern installation in Peterborough covers as its own separate set of decisions.
Keep reading
 GuideAluminium Roof Lanterns and Slim RaftersWhy slim aluminium rafters show more sky than bulkier frames, and the profile numbers worth asking for.
 GuideRoof Lantern Glazing Bars and the View UpHow many bars a lantern needs, where they land from your table, and how to line them up with the room.
 GuideRoof Lantern Upstands: Timber, Kerb or InsulatedHow a lantern's timber, factory insulated or low-profile kerb changes its warmth and the sightline from below.
Book a home visit
Tell us which room
- No obligation
- Sightline sketch included
- 10-year guarantee
Or call 01733 736163